Lagers
Crisp, clean, refined. The perfect balance of malt and hop. By definition, a lager is a beer made with bottom-fermenting yeast that prefer to work at a cooler, slower pace. Think: Pilsner, Oktoberfest, the coveted Bocks brewed by German monks for centuries.
Of course, most homebrewers begin with ales. Ales are safety nets for the new brewer: they mask off-flavors better than lagers, and don’t require lagering’s scrupulous temperature control.
Unfortunately, this norm creates the myth that only expert brewers can lager. Nothing could be further from the truth. Anyone can lager. As long as you follow a few basic principles, you’ll be good to go.

Yeast
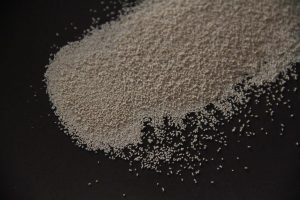
Yeast is the key. First and foremost, you need a lager-specific yeast strain.
If your packaged yeast doesn’t have a sufficient cell count to lager, you’ll need a starter. Think of a starter as protein powder for your yeast; it feeds the cells, letting them multiply and bulk up until they can better handle the sugar in your wort. The more cells at work, the healthier the fermentation.
In terms of quantities, follow this general rule: take the amount you use for an ale and double it.

Yeast Temperature
Get your wort temperature down. Chilling wort is always important. But, because lager yeast is so temperature-sensitive, it’s absolutely imperative here. Your brew must be at or below 60ºF (15ºC) before you pitch your yeast starter. No fudging.
Then, locate your temp-stable chamber and start the 3 stages of fermentation.
Stages Of Lagering
Unlike ales, lagers ferment in 3 steps: Primary Fermentation, Diacetyl Rest, and Lagering (cold storage). Let’s walk through them one at a time.
1. Primary Fermentation
Where sugar becomes CO2 and alcohol. We recommend pitching your yeast at a low temperature, which slows down fermentation and lengthens the time it takes for your yeast to metabolize the diacetyl. Your final brew is sure to be clean and clear.
2. Diacetyl Rest
For this stage, let your beer rise to room temperature and idle for three days. Diacetyl rest is where your yeast mops itself up. During Primary Fermentation, the yeast works its ass off, and, as one does, it gets a little sweaty along the way. This sweat takes the form of (among other off-flavors) diacetyl, which produces a buttery/butterscotch flavor. Sounds yummy in theory, but ultimately fights the lager’s crisp, clean bill.
During Diacetyl Rest (also known as maturation), the yeast breaks down these off-flavors, ensuring a more pure flavor. Think of it as spring cleaning in your beer.
3. Lagering
During this stage, the proteins, yeast and other particulates in your brew collect on the bottom of the fermentor. In terms of temperature, this is the most important step. To quickly and efficiently clarify your beer try to stay under 40ºF. Commercial breweries tend to lager at just above freezing (32ºF, 0ºC). Now you gotta wait. Because lager fermentation has more stages than ale fermentation, the time frame expands. Ain’t nothin’ you can do. The good news?
It’s worth it.

Leave a Reply
You must be logged in to post a comment.